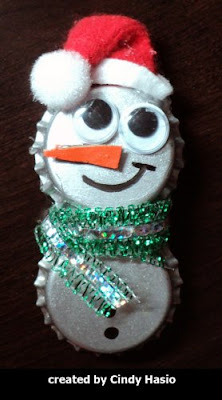
"Bubbly the Bottle Cap Snowman"
I like to recycle bottle caps in a creative way to show shape and symmetry. You can create several snowmen from bottle caps by attaching eyes and a piece of ribbon, then creating a hat and a nose and drawing buttons and a smile.
Materials:
Glue
Bottle caps
Tempera paint (white or silver) and paintbrushes
Black markers
A pack of "googly" eyes (Buy at the Dollar Tree)
Red and white Construction paper or felt
A spool of colored ribbon (Pre-cut them so each students gets a piece that is 6” long)
Scraps of orange paper
Procedures:
Cover the table with newspapers. Provide yourself or your children with paint and brushes. Explain to them that they will be painting two bottle caps and allowing it to dry while they create the hat and nose.
Cut out a small rectangle (1/2 inch). Then cut the rectangle in half to make the nose of the snowman.
Make a small red and white Santa hat using red and white construction paper or felt. You can fold the top of the hat over so that it looks like the top of the hat is drooping down.
When the paint is dried, glue both bottle caps together. You should glue the edges that will touch (the top and the bottom caps). Allow this to dry then take two small pieces of ‘googly’ eyes and glue them on the top bottle cap.
After the glue is dried, then use a 6” piece of colored ribbon.
Wrap the 6” piece of ribbon around the two caps in the middle. Use extra glue to bond the middle since it is not so strong. Wrap around the middle several times until it looks like a scarf. You may also tuck the end of the ribbon in the scarf to hold it.
Demonstrate gluing the hat. Finally, draw 3 black dots on the bottom cap for buttons and a smile on the face.
Note: You can glue a pin behind it to make a pin or attach a piece of string to make an ornament.
Frugal Living Index
Copyright © 2010 by Cindy Hasio. All rights reserved.


