"String Ornament with Nativity Scene"
To me Christmas should be about Christ. I want my tree to remind me of that and this ornament does. When I was a child I had an Easter basket made out of string. This ornament is a smaller version of that basket with the nativity scene added.
Supplies:
String or crochet thread in any color(s) you want
1 small balloon per ornament
Liquid starch (found in laundry section)
3 small or “baby” flat clothespins (found at most craft stores in the wood section)
Craft paint – flesh tone, brown, & blue
Brown & blue felt
Moss
Small piece of tan or rough looking material
Black fine tip sharpie or permanent marker
Ribbon (approximately 20 inches), pearl ribbon approximately 10 inches, etc to decorate around opening
Hot glue gun
Small bowl to pour starch in
Large plastic or glass container that the balloon will fit into without touching the bottom or the sides
Paint brushes
5 thin nails, hammer & small piece of wood
Newspaper
Tweezers
PART 1: Make the String Outer-Ball & String Star for the Inside
1. ORNAMENT - Cover work area with newspaper. Blow up a small balloon to desired size of ornament. Pour liquid starch into a bowl.
2. Unwind and soak some of the thread in the starch. Be careful not to tangle it up. Tie one end of the thread/string to the top of the balloon. Wrap the thread around the balloon. Leave lots of holes in between the layers of thread as you randomly wrap it around going in all directions. Continue soaking thread and wrapping the balloon until it looks the way that you want it. The majority of the balloon should be covered with some of the balloon visible.
3. Before cutting the thread off you can wrap it around a pencil at the top to make it easier to hang. Wrap the thread around the end of the balloon then tie a knot and cut the thread.
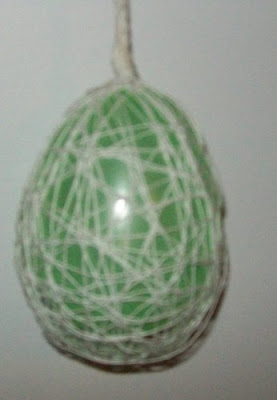
4. Use a paintbrush to thickly coat and soak the threads on the balloon a second time. Hang the balloon suspended from the pencil inside your large container. Make sure that the balloon is not touching the sides or the bottom or it will take longer to dry. The excess starch will drip into the bottom as it dries. Leave to dry. It may take a day or two to completely dry and harden.
(Picture 3)
(Picture 1)
5. STAR - Draw a small star on the piece of wood. Hammer the 5 nails into the 5 points of the star. Tie one end of the thread to the top nail. Wrap the thread around the nails just as if you were drawing the star, see picture 1. Repeat several times until you have a star several layers thick. End the thread at the top where you began. Use a paintbrush to thickly coat and soak the threads of the star. Allow to dry along with the balloon. You can also make larger stars to hang on the tree by themselves. See picture 2.
(Picture 2)
6. STAR - Once the thread has completely dried and hardened you can gently remove the nails from the wood and pull them out of the star. Make sure that you don’t pull the layers of thread apart. Leave the string hanging at the top. You will use it to attach the star to the inside of the ornament. See picture 6
(Picture 6 )
(Picture 3 )
(Picture 4)
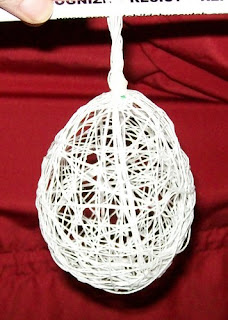
ORNAMENT – Make sure that the entire ornament is dry. It should look like picture 3. Use a pin or scissors to pop the balloon. Use the tweezers to gently pull the balloon out of the ornament through one of the spaces between the strings. The ornament should now look like picture 4. You can put it on the tree now or continue to add the nativity scene on the inside.
Cut a small circle, the size of the opening that you want in your ornament, out of paper and temporarily attach it to the front of the ornament. Trace around the ornament with the sharpie. Remove the paper circle. Carefully cut the circle out of the thread ornament.
Cut your ribbon into two, 10 inch pieces. Use the hot glue to attach one piece of ribbon to the inside of the circle. Make sure that all the loose “ends” of string around the opening are glued to the ribbon. Glue the second piece of ribbon over the top of the first piece, this time on the outside of the circle. This will hold the loose ends inside the two pieces of ribbon and give you a more finished edge. Glue the pearls or any other decorations that you want to the ornament.
PART 2: Make Family for Inside
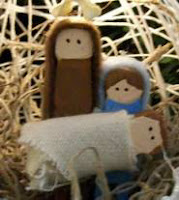
1. Paint a round circle on the top, front of the three clothes pins for the faces. Paint hair on Jesus and bangs on Mary and Joseph, if desired. Paint Mary’s body blue and Joseph’s body brown.
2. Cut strips of felt and hot glue them to the back and sides of Mary & Joseph’s head and body for their scarves. Wrap the piece of rough material around Jesus like you would a baby. Glue it on.
3. Draw eyes on the three people with the sharpie or black marker.
4. Glue Mary and Joseph together with Mary’s head slightly lower than Joseph’s. Mary’s legs should stick out lower than Joseph’s. You can cut them off even or just leave them, the difference will be hidden by the moss. Glue baby Jesus to the front of Mary and Joseph as if they were holding him.
PART 3: Finish the Ornament
1. Add some moss to the bottom, inside of the ornament. Put hot glue on the bottom of Mary & Joseph’s legs and press them to the bottom of the ornament so they are standing inside the moss. Adjust moss as needed to help them stand up straight and to hide their feet.
2. Put hot glue on the string on the end of the star and hang from the top, inside of the ornament so that the star hangs over Mary and Joseph.
3. You are done. See picture 5. Hang it on the tree. If you have small lights you can stick one through the back of the ornament so that it hangs behind the star and lights up the center of the nativity scene.
(Picture 5)
Return to 2nd Annual Homemade Christmas Ornament Contest
Frugal Living Index
Copyright © 2008 by Candace Tatton. All rights reserved.


